10:06

Enjoy The Rain

Publicado por Natty |

Photobucket


Este tutorial lo he realizado con el Hermoso Scrpap, PTU **ANTS IN RAINY DAY** , de Karla Scrapz"


Con él podreis hacer imágenes preciosas. Podeis adquirirlo AQUÍ.


También he utilizado el arte de Dean Yeagle www.cagedbeable.com. Para su uso es necesaria la


licencia y adquirirlo en C.I.L.M.


Material GIF"AQUI.


Filtro utilizado Eye Candy 4000/Jigle.


Comenzamos:


1- Abro una nueva capa de 600 x 600 Pixeles, pinto de color blanco.


2- Abro una nueva capa de despliegue voy al Paper k-s14 Imagen/Reflejar , selecciono la capa copio y pego en la selecion el paper k-s14.


3- Voy a mascaras/nueva apartir de una imagen, marcado invertir datos y aplico la mask gs-mask circle030 al paper k-s 14.luego mascaras/borrar digo si".


4- redimension de todos los elementos ubicados ver imagen final su ubicacion, a todos los elementos ir efectos/acentuar:


- Elemento k-s decorated fenced voy Imagen/redimensionar 605x605 pixels.


- Elemento k-s rain Imagen/redimensionar 500x433 pixeles.


- Elemento k-s cloud2 Imagen/rdimensionar 300x230 pixeles.


- Elemento k-s rainbown voy Imagen /reflejar, Imagen/redimensionar 500 x500. borrar con la herramienta goma lo que sobre ira ubicado entre las dos nubes ver imagen final.


- Elemento k-scloud2 Imagen/redimensionar 250x191 pixls.


- Elemento imagen/redimensionar, k-s flowers of garden2 , 170x252 pixles.


-Elemento Imagen/redimensionar, k-s decorated umbrella2 180x216 pxls.


- Tube de la chica en su tamaño original.


5- Pongo sombra a todos los Elemtos que sobresalga a gusto.


6- Texto Enjoy The Rain", esta realizado con la Font", Calvin". tamaño 48.-


Color Celeste : Tinte 138, Saturacion 160.


Color Rosado: Tinte 237, Saturacion 176.- Voy a capas/Fusionar todas las capas visibles.


7- ubico en la Imagen,con el que trabajaremos, Elemento Imagen/redimensionar, k-s water pudle 250x67 pxls.


8- Capa k-s Water Pudle me ubico en ella , duplico por dos capas mas osea me quedan tres capas, con la Herramienta varita magica pico dentro y queda seleccionado.


ver muestra:


9- Aplico el Filtro Eye candy 4000/ Jigle valore: Bubles, 34.00, 2.45 , 20. variando el Radom capa a capa.quito seleccion.


10- Fusiono todo.Guardo como imagen psp.


11- Abro la Imagen guarda, Editar/seleccionar todo.


12- Abro el gif" Gota de agua, selecciono todo, copio y pego el Gif de la gota en la Imagen , ver donde van ubicadas mas omenos las gotas yo he colocado dos".


13- Por ultimo, Animacion/propieddes de la animacion y damos un valor de 35.


14- Guardar como Imagen Gif".


Espero les haya gustado, cualquier cosa me consultan, muchas gracias".


Besos Natty*.

22:05

GIRLS PIRATA

Publicado por Faria |


Tutorial done with the beautiful Scrap PTU *Pirate Girls*, of Karla Srapz.

You can find it HERE.

I also have used an artist tube of Elias Chastzoudis, in order to use it you must aquire a license in C.I.L.M.

Mask download HERE.

Start:

1-Open a transparent raster layer 700x600.

2-To that same layer select it, go to select/selections all Copy and paste K-S pirate2, selections none.

3-To that same layer apply the Mask911_Template, go to mask/from an image/invert checked and apply the paper pirate2.

4-Now give to all the resized elements with its respective name to finish image as you see it.

-Element k-s caravel pink resize 49% Image/sharpen.
-Element k-s frame caravel purple, resize 49% Image/sharpen.
-Element pirate life X resize 37% Image/sharpen.
-Element k-s cross bone resize 9% Image/sharpen.
-Element k-s pirate ship resize 64% Image/sharpen.
-Element k-s palm 1 resize 68% Image/mirror/sharpen.
-Element k-s palm 2 resize 45% Image/sharpen.
-Element k-s treasure chest resize 38% Image/mirror/sharpen.
-Tube of the Pirate resize 68% Image/sharpen.
-Element tucan purple on top of the hat of the girl resize 18%. Image/sharpen.
-Element k-s danger cayon resize 45% Image/sharpen.
-Element k-s pum pirate resize 10% Image/sharpen. in between the legs of the girl.

All the resized elements go by order of placement in the image. see final image.

5-Shadow to all the elements I used -2/6/50/5 color black.

6-Name PIRATA use the font Singothic. Contour 3F1739, to 70% place as you see in the image.

7-Name GIRLS use the font Singothic. Contour 3F1739, fill 973251, to 70% strectch and place ontop of the letters Pirata.

8-Element k-s pirate symbol pink resize 9% Image/sharpen, place about 4 of the letters see image.

9-Shadow use Eye Candy 4000/corona to 5% the first color pink for the name Pirata and Girls.

10-Save as a JPG, and you are done, I hope you enjoyed this tutorial it is easy to do and very pretty with a marvelous Scrap.

Greetings Natty.

Translated by Silvia

22:00

Girls Pirata

Publicado por Natty" |


Tutorial realizado con el bellísimo Scrap PTU *Pirate Girls*, de Karla Srapz.


podeis adquirirlo AQUÍ.


Además he utilizado un tubo del artista Elias Chastzoudis, para su uso es necesaria la licencia y adquirirlo en C.I.L.M.


Máscara descargar AQUÍ.


Comenzamos.


1- Abrimos un paño transparente de 700x600 pixeles.

2- A esa misma capa la selecciono, voy a Seleccionar/selecciono todo Copio y pego K-S paper pirate2, quito seleccion.

3- A esa capa le aplico la Mask 911_Template, voy a mascaras/Nueva apartir de una imagen/tildando, Invertir datos de la mascara y aplico al paper pirate2.

4- Ahora ire dando cada elemento redimensionado con su respectivo nombre para realizar la
imagen tal y como se ve.


- Elemeto k-s caravel pink redimensiono al 49% Imagen/acentuar.

- Elemento k-s frame caravel purple, redimensiono al 49% Imagen/acentuar.

- Elemento pirate life X redimensiono al 37% Imagen acentuar.

- Elemento k-s cross bone redimensiono al 9% Imagen/acentuar.

- Elemento k-s pirate ship redimensiono al 64% Imagen/acentuar.

- Elemento k-s palm 1 redimensiono al 68% Imagen/reflejar Imagen /acentuar.

- Elemento k-s palm2 redimensiono al 45% Imagen acentuar.

- Elemento k-s treasure chets redimensiono al 38% Imagen/reflejar Imagen/acentuar.

- Tube de la Pirata redimensiono al 86% Imagen acentuar.

- Elemento tucan morado arriba del gorro de la chica redimensiono al 18%. Imagen/acentuar.

- Elemento k-s danger cayon redimensiono al 45% Imagen/acentuar.

- Elemento k-s pum pirate redimensiono al 10% Imagen/acentuar. entre las piernas de la chica.

- Todos estos elementos redimensionados van por orden de ubicacion en la imagen. ver imagen fiinal.

5- Sombra a cada elemento que sobresalga yo use -2/ 6 / 50 / 5 color negro.

6- Nombre PIRATA use la Font Singothic. Contorno 3F1739, Relleno 4E7327. Al 70% estirar y acomodar como en la imagen.

7- Nombre GIRLS use la Font Singothic. Contorno 3F1739, Relleno 973251, al 70% estirar yubicar arriba de la letra Pirata.

8- Elemento k-s pirate simbol pink redimensiono al 9% Imagen/acentuar, y ubico unos 4 arriba de las letras ver imagen.

9- Sombra yo use Eye Candy 4000 /corona a un 5 % el primer valor color rosa para los nombres Pirata y Girls.

10- Guradamos como imagen JPG", y listo espero le haya gustado es muy facil para realisar y un bonito trabajo con un maravilloso Scrap.


Saludos Natty".


10:20

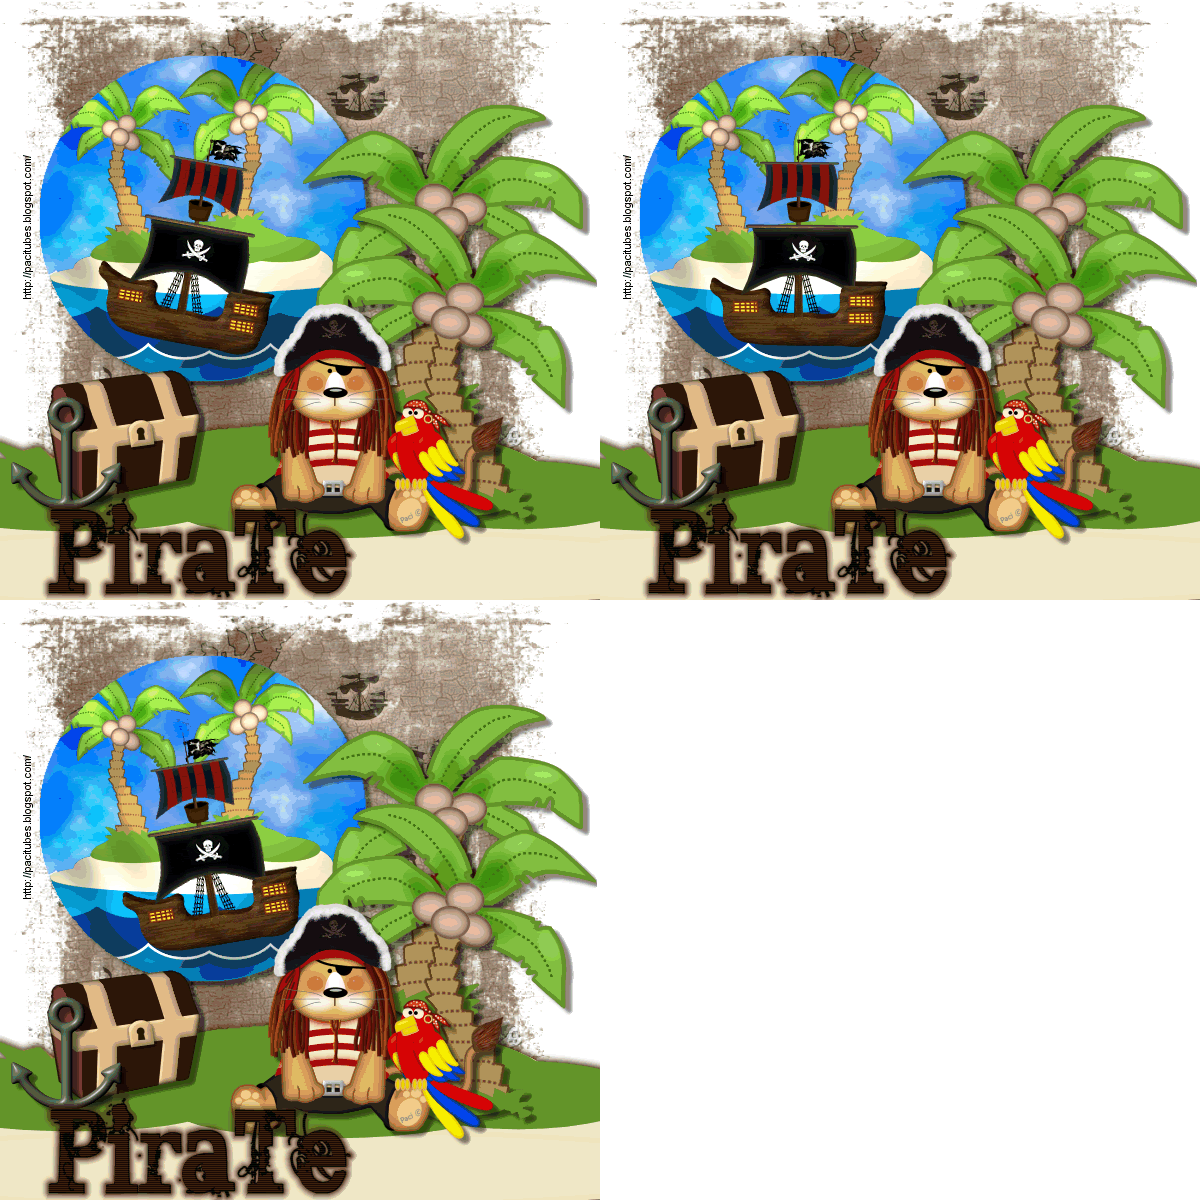
PIRATE

Publicado por Faria |


This turorial was made with the beautiful FTU scrap kit *Pirate_Lion_By_Paci* of "Paci Tubes". You can find it HERE. Thank you Paci.

Mask and Material HERE

Filters used: Graphic plus/cross shadow, Photo Effect/scanlin, Eye Candy 4000/Corona.

Start:

1-Open a new raster layer in pixels.

2-To the same layer select and go to selections/select all and copy and paste Papel Pirate_Map, in the selection/selections none, apply the Mask Cid_4C3 to that layer, go to mask/new from image and apply, then mask/delete.

3-Copy and paste as a new raster layer the Template that is in the material, with the magic wand click inside the template and it will be selected, copy and paste the Pirate_Ski_Paper in the selection, without removing the selection copy and paste the into the selection Island2_By Paci, now we can take the selection off, apply Filter Graphic Plus/Cross Shadow varying the settings as you like(do not iluminate too much).

4-We will work with the element Pirate_Galleon(Ship). Resize the ship to 20%, copy and passte as a new layer on top of the template in the water part.

-Attention, duplicate the layer of the ship two times, I now have 3 layers. And I place them like this. First layer Pirate Galleon (ship) go to the image and rotate freely 10 degrees to the left. Second Layer Pirate galleon (ship) leave as is. Third Layer Pirate galleon (ship) go to image and rotate freely 15 degrees. See image.
Photobucket
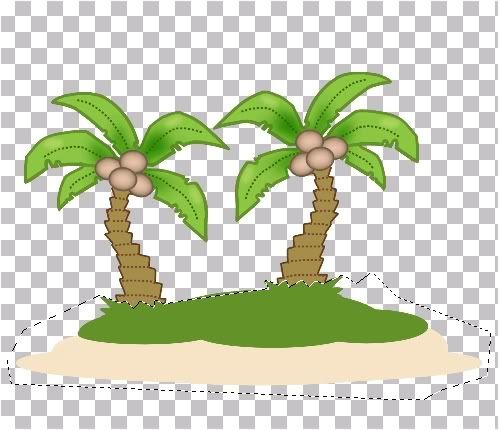
5-Now we will work with the element Island2, which we will use the lasso tool because we only need the part of the earth. See image.
Photobucket
Photobucket

6-Copy and paste the part of the earth as a new layer see the final image.

7-Resize the element COCONUT 45%, to which we duplicate two times, one of them go to image/mirror and paste as a new image. See final image.

8-Resize the element Pirate_and_his 36%, copy and paste as a new image in the layer.

9-Resize the element Pirate Chest 30% copy and paste as a new image in the layer.

10-Resize the element Ancla_By Paci 19% copy and paste as a new layer in the image. See final image.

11-Shadow as you would like to all the elements.

12-Text, Pirate I used the font Broken Ghost, size 70 and strech a little see image, fill color #321C06 contour black.

13-To the text I applied the filter Photo Effect/Scanlines, values: 1,1,20,10,0,0 then Eye Candy 4000/Corona with the color #321C06, first value 9.

14-Layers merge visible.

15-Save as a psp image.

16-Open the image in animation go to animation/frame properties and give a value of 30 to 40 to each layer, then save as a gif.

This is all I have had a wonderful time doing this tutorial, I hope you liked it.

Greetings, Natty.

10:17

Pirate

Publicado por Natty" |


Este tutorial está realizado con el bellísimo y Divertido Scrap FTU *Pirate_Lion_By_Paci*, de "Paci Tubes".
Podeis encontrarlo AQUÍ. Gracias Paci".
Mascaras y Material AQUI.
Filtros utilisados:
Graphis plus/cross shadow
Phot Effect/scanline.
Eye candy 4000/ Corona.
Comenzamos".
1- Abro un Nuevo paño de 600x600 pixeles.
2-A esa misma capa la selecciono voy a seleccionar/seleccionar todo copio y pego Papel Pirate_Map, en la seleccion/quito seleccion, le aplico la Mascara Cid_4C3 a esa capa, voy a mascaras/nueva apartir de una imagen y la aplico, luego voy a mascaras/borrar digo si".
3- Copioy pego como nueva capa el Template que va junto al material, con la herramienta varita magica pico dentro del Template queda seleccionado, copioy pego papel Pirate_Ski_paper en la seleccion, Sin Quitar la Seleccion", copioy pego en la seleccion elemento Island2_By Paci ya puedo quitar la seleccion", y aplico Filtro Graphis Pluss cross shadow variando setting a gusto (no iluminar demasiado).
4- Trabajaremos con el elemento Pirate_Galleon (Barco).
- Redimensiono el braco al 20% copio y pego como nueva capa arriba del Template en la parte del agua.
- Atencion", duplico esa capa del Barco por dos me quedaran Tres" capas. a las cuales ubico asi.
- Primera capa Pirate Galleon (barco), voy a imagen rotar 10% a la Izquierda libre.
- Segunda capa Pirate galleon (barco), la dejo tal cual esta.
- Tercera Capa Pirate galleon (barco), voy a imagen rotar 10% a la derecha libre.
ver imagen:
Photobucket


5- Ahora trabajaremos con el elemento Islan2, al cual con la herramineta lazo voy a recortarlo por que solo necesitamos la parte de la tierra y lo corto. ver dibujo.


Photobucket
Photobucket


6- Copio y pego la parte de la isla tierra recortada como nueva capa en la imagen ver imagen final para ubicarse.

7- Redimensiono el elemento COCONUT, al 45% duplico por dos y una voy a imagen reflejar y pego como nueva capa en la imagen ver como estan ubicadas una mas arriba que la otra.

8- Redimensiono el elemento Pirate_and_his, al 36% copioy pego como nueva capa en la imagen.

9- Redimensiono el elemento Pirate Chest al 30% copioy pego como nueva en la imagen.

10- Redimensiono el elemenot Ancla_By paci, al 19% copio y pego como nueva capa en la imagen ver ubicacion de cada elemento.

11- Sombra a gusto a todos los elementos que sobresalga.

12- Texto, Pirate yo use la font Broken Ghost", tamaño 70 estirar un poco ver imagen, color contorno Negro Relleno 321C06.

13- Al texto le aplique el filtro Photo Efect escanline, valores: 1,1,20,10,0,0. y luego el Filtro Eye candy 4000 Corona con el color 321C06, primer valor 9.

14- Fusinar capas visibles.

15- Guardar como imagen psp".

16- Abro imagen en Animation 3 voy a Animation/Frame Propiedades y le doy un valor de 30 0 40 a cada capa, luego guardo como imagen GIF":

- Eso es todo me he divertido mucho con este Tutorial, espero les guste.

Saludos Natty".

15:11

TU MITAD

Publicado por Faria |


This tutorial was made with the scrap kit FTU *Bell Pink* of "Mundo Grafico".

You can find it HERE. Thanks Paola.

I have also used a tube FTU from the artist Dave Hoover http://www.ERBZINE.com/Mag3/o340.HTML you can download it HERE.

Mask material HERE.

Filters used: Graphic Plus/Cross Shadow.

Start:

1-Open a new layer 600x600 in pixels.

2-To this layer go to selections select all and copy and paste the Paperss into the selection, selections none, to this layer apply the mask Vix Mask 177, go to mask/from image and apply, mask delete.

3-Open a new raster layer and selections select all, copy and paste Papers Soy Tu Mitad Fuxia, into the selection, selections none and to this layer apply Mask 911_Template, invert checked apply the mask, mask delete.

4-Resize all the elements.

FRAME2 20%, sharpen image. Copy and paste as a new layer. With the magic wand click inside the frame, frame by frame and then copy and paste one of the papers, I used PAPERS, PAPERSS, PAPERS2, PAPERSS2.

And so click on one of the frames and copy and paste the papers. Without taking the selection off apply Filter Graphic Plus/Cross Shadow, varying the diagnol of the filter, selections none. Do the same with the rest of the frames. See final image.

-FLOWERS1 there are 4 resize 8% and place in the image exchanging color with Flower2, Sharpen.
-FLOWER2 there are 4 resize 8% and place in the image exchanging with Flower1. Sharpen.
-ANGEL2 resize 20%. Sharpen.
-HEARTS2 resize 20%. Sharpen.
-LADYBUG2 resize 8%. Sharpen.
-MARIPOSA2(butterfly2) there is a total of 3 one of the images rotate freely 20 degrees to the left, the other mirror, then sharpen.

5-Resize the tube of the girl 70% and place the image, sharpen.

6-Shadow as you like.

7-Text Font "Not His Angel" size 36 contour black, fill #B02B62. Apply the filter Graphic Plus/Cross Shadow vary the settings as you like. Apply Shadow.

8-This is all save as a PNG.

I hope you liked this tutorial, if you need to ask questions feel free to ask.

Greetings Natty

Translated by Silvia

15:00

Tu Mitad

Publicado por Natty" |


Este tutorial está realizado con el bellísimo Scrap FTU *Bell Pink*, de "Mundo Grafico".


Podeis encontrarlo AQUÍ. Gracias Paola".


Además he utilizado un tubo FTU", del artista Dave Hoover"


Podeis descargarlo AQUI.


Mascaras Material AQUI.


Filtros Utilisado: Graphis Pluss/ Cross Shadow.


COMENZAMOS"


1- Abro nuevo paño de 600x600 pixeles.


2- A esa misma capa la selecciono, voy a seleccionar/seleccionar todo copio y pego Paperss"en la seleccion,quito seleccion y a esa capa le aplico la mascara Vix Mask 177, voy a mascaras/Nueva apartir de una imagen y aplico mask. luego mascaras/borrar digo si".


3- Abro nueva capa de despliegue selecciono todo, voy a seleccionar, queda seleccionado copio y pego Papers" Soy Tu Mitad Fuxia, en la seleccion , quito seleccion, y a esa misma capa le aplico la Mask 911_ Template , Invertir datos marcado", aplico mask y luego mascaras/borrar digo si".


4- Redimesiono los elementos.


- FRAME2 redimesiono al 20% Imagen/acentuar.Copio y pego como nueva capa.


- Con la Herramienta Varita magica", Pico dentro del frame que quede seleccionado cuadro por cuadro, y copio pego de un en uno los papeles", yo use: PAPERS, PAPERSS, PAPERS2 Y PAPERSS2".


OSEA:


- Pico con la varita dentro de un cuadro y copio y pego PAPERS",Sin quitar la seleccion aplico Filtro Graphis pluss/cross Shadow variando Diagonal del filtro, quito seleccion. y este mismo trabajo lo realizo con los tres cuadros que quedan del Frame aplicando tambien el filtro Graphis plus" y quedan los papeles pegados ver imagen final.


- FLOWERS1 Son 4" flores redimensiono al 8%, ubico en la imagen intercalando color con Flower2, Imagen/acentuar.


-FLOWERS2 Son 4" flores redimensiono al 8%, ubico en la imagen intercalando con Flower1, Imagen/acentuar.


-ANGEL2 redimensiono al 20% Imagen/acentuar.


-HEARTS2 redimensiono al 20% Imagen /acentuar.


-LADYBUG2 redimensiono al 8% Imagen/reflejar, Imagen/acentuar.


- MARIPOSA2 En total 3" mariposas una Imagen/Rotar 20% Libre Izquierda, Otra reflejar, Luego a las tres Imagen/acentuar.


5- Redimesino tube de la chica al 70% ubicar en la Imagen, Imagen/acentuar.


6- Sombra que sobresalga a gusto".


7- Texto Font" Not His Angel" al 36% Contorno Negro", Relleno #B02B62. Aplico tambien el filtro Graphis pluss/cross Shadow variando seting" a gusto. y pongo sombra.


8- Eso es todo Guardo Imagen como PNG".


Espero les haya gustado.


cualquier cosa me consultais.


saludos natty".

10:50

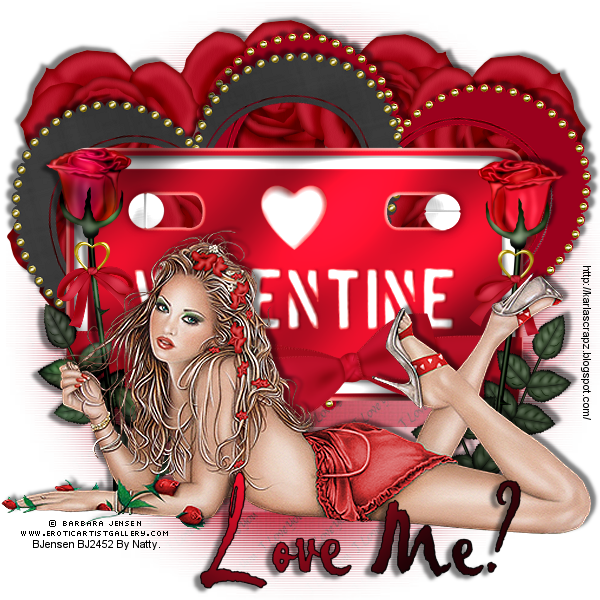
LOVE ME

Publicado por Faria |


This tutorial was done with the beautiful Scrap FTU **Crazy For Love**, of Karla Scrapz, you can find it HERE
.

Also I have used a tube from the artist Barbara Jensen, in order to use it you must adquire a license HERE.

Filter Graphic Plus Cross Shadow

Mask download HERE.

Start:

1-Open a image 600x600 pixels.

2-To that same layer go to selections/select all, copy and paste PAPER2k-s into selection.

3-Go to masks and apply the mask 911_Template, go to mask/from image invert checked and apply to the paper. Mask/delete say yes.

4-Resize all the elements so they look like the image.

-Red Rose k-s resize 7 roses to 20%. Four you can see the others will go below to cover the holes that are white from the cartel Plaque valentine, see final imaage.

-Black heartk-s resize to 12%, go to the image and rotate freely 15 degrees to the left, and place.

-Red Heart k-s resize to 12% go to the image and rotate freely 15 degrees to the right place on the layer on top of the roses. See image.

-Plaque Valentine k-s resize 48% and apply Filter Graphic Plus/Cross Shadow.

-Lace2 k-s resize 18% and place ontop of the valentine plaque.

-Rose k-s resize 20% there are two and place laterally on the frame Plaque Valentine to both appy filter Graphics Plus/Cross Shadow, one of the roses image/mirror.

-Golden Heart Ribbon, there are two resize 12% go to image/mirror and place ontop of the roses.

-Tube of the girl resize 110% and place on the image.

5-Text Love Me? Font Pablo Plain, contour black, fill #9B0B1D and apply filter Graphic Plus/Cross Shadow.

6-To all the elements that are resized go to image/sharpen.

7-Shadow as you like.

"Thanks to all I hope you enjoyed this tutorial, if you have questions please feel free to ask. Greetings Natty".

Translated by Silvia

10:48

Love Me

Publicado por Natty" |


Este tutorial está realizado con el bellísimo Scrap FTU **Crazy For Love**, de Karla Scrapz, Podeis encontrarlo AQUÍ.
Además he utilizado un tubo del artista Barbara Jensen, para su uso es necesaria la licencia y adquirirlo AQUI.

Filtro Graphis Pluss Cross Shadow.


Máscara descargar AQUI.


EMPEZAMOS:


1- Abrimos un paño 600X600 Pixeles.


2- A esa misma capa vamos a seleccionar/seleccionar todo copio y pego en la seleccion PAPER2k-s.


3- Voy a mascaras y a esa capa le aplico la mask 911_Template, voy mascaras/Nueva apartir de una imagen/marcado inveritr datos de mascara y la aplico al papel. mascaras/Borrar digo si".


4- Redimensiono los elementos para que queden como en la imagen.


- Red Rose k-s redimensiono 7 rosas al 20%. cuatro estan a la vista las otras iran por debajo para cubrir los agujeros que queden en blanco del cartel Plaque valentine. ver imgen final.


- Black heart k-s redimensiono al 12% voy a Imagen/rotar al 15% Izquierda, libre y acomodo en el paño.


-Red Heart k-s redimensiono al 12% voy a Imagen/rotar al 15% Derecha, libre y acomodo en el paño arriba de las rosas ver imagen.


-Plaque Valentine k-s redimensiono al 48% y le aplico filtro Graphis pluss/cross shadow.


- Lace2 k-s redimensiono al 18% ubico encima de la plaque valentine.


- Rose k-s redimensiono son dos al 20% ubico en los laterales del Frame Plaque Valentine a las dos aplico filtro Graphis plus/cross sadow. una de las rosas Imagen/reflejar.


- Golden Heart Ribbon son dos redimensiono al 12% uno Imagen /reflejar. ubico sobre las Roses.


- Tube de la chica redimensiono al 110% y ubico en la imagen.


5- Texto Love me?, Font Pablo Plain, contorno Negro , Relleno #9B0B1D.Y aplico filtro Graphis Pluss/Cross Sadow.


6- A todos los elementos una vez redimendionados voy a Imagen/acentuar.


7- Sombra que sobresalga a gusto.

"Gracias a todos,

espero que le haya gustado, si teneis alguna me consultais

Saludos Natty".

9:59

HARMONY

Publicado por Faria |


This tutorial was done with the fantastic "Scrap FTU Hopeful Gree", of SCRAPS DIMENSIONS. You can find it HERE.

I have also used an artist tube of Barbara Jensen, you must obtain a license and adquire it HERE.

Filters used:
Adjust/Variation
Graphic Plus/Cross Shadow

Additional material download HERE
.

Start:


1-Open a transparent raste layer 600x550.

2-To that same layer go to selections/select all, copy and paste the PAPER10, without taking the selection off copy and paste in the selection FLORTUBE. Selections none.

3-To that same layer apply the mask MKUY, go to mask/new from image/luminosity checked and apply, go to mask and delet.

4-Elements:

-Paste as a new layer in the image the named elements.
-FRAME resize 80% and sharpen.
-FLOWER2 resize 35% and sharpen.
-CALLA LILLIE resize 50% and sharpen
-LEAVES resize 30% there are 3 bunches torate freely 90% one of the bunch of leaves, image-mirror, then to the other bunch of leaves, image sharpen.
-BRANCH2 resize 10%, image-mirror and sharpen.
-DOODLE1 there are two resize 10%, image-mirror, sharpen both. They go behind the element FLOWER2, if the stalk is longer at the bottom, use the eraser tool and erase what is left over.
-DOODLE2 resize 30% there are two, one of them image-mirror, sharpen.
-BRANCH2 resize 10%, image-mirror, sharpen.

5-Go to the girl tube and with the selection tool get part of her face, see image, go to cut and accept.

6-Now to that cut we apply the filter Adjust/Variation/More Green two times, and to that cut I apply filter Graphics Plus/Cross Shadow, lowering the intensity.

7-No we will work with the frame, so that we can paste our face, situate on it, close all layers, with the magic wand situate yourself on the frame and click on the first frame copy and paste the face of the girl, selections none. Go to the middle frame click with the magic wand and it will be selected, go to the girl tube image/mirror and paste into selection, selections none. Last thing situate on the last frame click with the magic wand, and copy and paste the face of the girl, selections none. See final image. Open up your layers.

8-Now paste as a new layer the girl tube as you see it. See final image.

9-In order to do the name Harmony I used the font Ellida at 80%, applied shadow and the filter Graphic Plus/Cross Shadow at the end, the font is included in the material.

10-Shadow to your taste, so it is visible.

11-Done and save as a PNG image.

This is all hope you liked it, greetings, Natty.

Translated by Silvia

9:57

Harmony

Publicado por Natty" |


Tutorial realizado con el fantástico "Scrap FTU Hopeful Green", de SCRAPS DIMENSIONS. Podeis encontrarlo AQUÍ.


Además he utilizado un tubo de Barbara Jensen, para usarlo es necesario obtener la licencia y adquirirlo AQUI.

Filtros utilisados:
Adjust/Variation
Graphis Pluss/Cross shadow

Material adicional descargar AQUI.


Comenzamos"

1- Abrimos un paño transparente de 600 x 550.

2- A esa misma capa la seleccionamos vamos a seleccionar/seleccionar todo, Copio y pego el PAPPER 10, Sin quitar la seleccion copio y pego en la seleccion FLORTUBE.Quito seleccion.

3- A esa misma capa le aplico la mascara MKUY, Voy a mascaras/nueva apartir de una imagen/luminosidad de origen marcado y la aplico , voy a mascaras Borrar digo si".

4-Elementos:
- Pego como nueva capa en la imagen elementos nombrados.
- FRAME redimensiono al 80% Imagen-acentuar.
- FLOWER2 redimensiono al 35% Imagen -acentuar, son tres flores ver dibujo.
- CALLA LILLIE redimensiono al 50% Imagen - acentuar.
- LEAVES redimensiono al 30% son 3 ramos de LEAVES rotar Izquierda 90% libre y un ramo Leaves Imagen - reflejar, luego a los tres ramos Leaves, Imagen - acentuar.
- BRANCH2 redimensiono al 10% Imagen - reflejar, Imagen - acentuar.
- DOODLE1 redimensiono al 30% son dos, uno Imagen reflejar, luego Imagen - acentuar a los dos. van detras del elemento FLOWER2, si sobra el tallo por debajo ,usar la herramienta borrador y borrar lo que sobra por debajo.
- DOODLE2, redimensiono al 30% son dos, uno Imagen reflejar , Imagen - acentuar.
- BRANCH2 redimensiono al 10% Imagen Reflejar Imagen-acentuar.

5- Voy al tube de la chica y con la herramienta seleccionar selecciono una parte del rostro", ver imagen, y voy a recortar, la recorto.

6- Ahora a ese recorte del rostro le aplico el Filtro Adjust/Variation/More Green dos veces", y a ese mismo recorte le aplico el Filtro Graphis Pluss/ Cross Shadow, vajando un poco la intensidad.

7- Trabajaremos con el frame para pegar el rostro, nos situamos en el , cerrando demas gafitas en la paleta de capas asi podemos trabajar, con la herramienta varita magica me situo en Frame y pico en el primer frame con la varita se selecciona y copio y pego en la seleccion el rostro de la chica, quito sleccion. voy al frame del medio pico con la varita magica ,se selecciona, voy al tube de la chica Imagen/reflejar copio y pego en la seleccion, quito seleccion, y por ultimo me situo en el ultimo frame, pico con la varita se selecciona copio y pego el tube del rostro de la chica en la seleccion y quito seleccion.ver imagen final.abro demas gafitas.

8- Ahora pego como nueva capa Tube de la chica tal cual. ver imagen final.

9- Para relaisar el Nombre Harmony use la fuente Ellida al 80 %, aplique sombra y el filtro Graphis pluss/Cross shadow al final , la font va incluida en el material.

10- Sombra a todo que sobresalga, a gusto".

11- Terminamos guardamos como imagen PNG" y listo.

Eso es todo espero les guste, saludos, Natty.

22:02

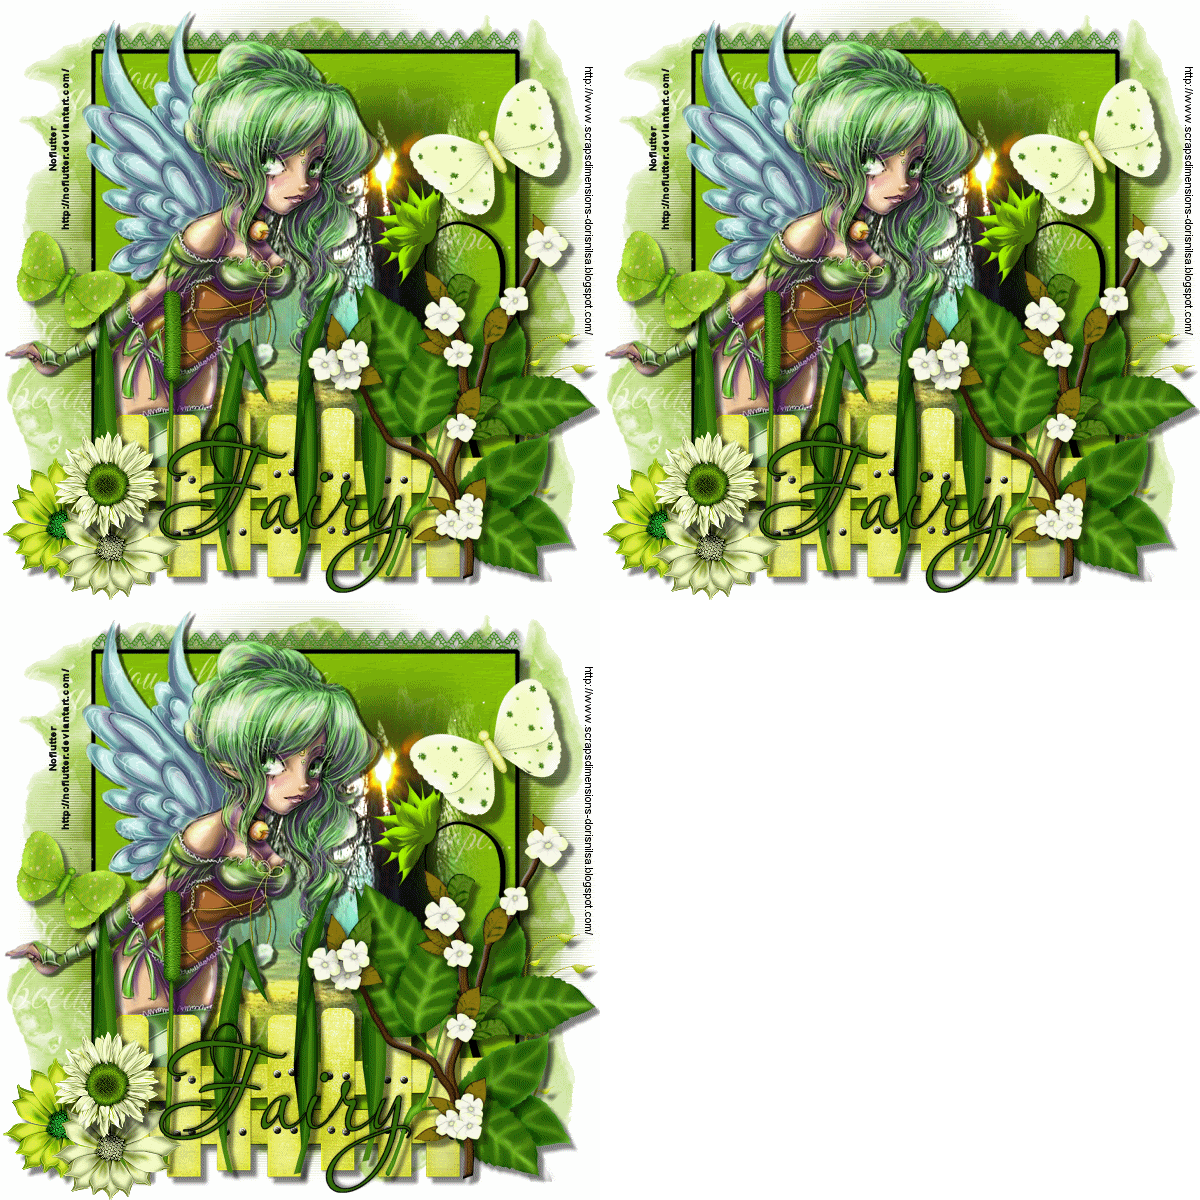
FAIRY

Publicado por Faria |


Tutorial done with the fantastic Scrap FTU "Hopeful Green", of Scraps Dimensions. You can find it HERE.

I have also used an artist tube FTU of Noflutter http://noflutter.deviantart.com/ Tube HERE.
.

Additional material download HERE..

Plugin: Filter Eye Candy 4000/Jiggle.

Start:

1-Open a new transparent layer 600x600 pixels and color it white.

2-Open a new raster layer, go to selections/select all, copy and paste PAPER1, selections none, to that same layer apply the mask mkuy, go to mask/new from image, invert checked and luminosity of origin checked. Apply the mask. Mask/delete. Say yes.

3-Open a new raster layer, go to selections/select all, copy and paste PAPER9, selections none, to this same layer apply the mask 911_teplate_bylnc, go to mask/new from image, luminosity checked and apply the mask, go to mask and delete. In the layer palette lower the opacity to 60%.

4-Paste the Frame scene as a new layer.

5-Paste the girl tube as a new layer, see the final image where it is placed.

6-Now we paste as a new layer each element that I will tell you and you can see in the final image.

Resized elements:

-Element FENCE, resize 70%. Sharpen
-Element GRASS, resize 50%. Sharpen
-Element FLOWER1, resize 27%. Sharpen
-Element FLOWER3, resize 27%. Sharpen
-Element SUNFLOWER2, resize 27%. Sharpen
-Element LACE RIBBON, resize 75%, goes behind the frame scene, erase with the eraser tool in the side if something is left over so that it is adjusted to the frame
-Element BUTTERFLY1, Resize 37%, image rotate freely 30 degrees to the left, sharpen.
-Element BUTTERFLY2, resize 18%, image rotate freely 30 degrees to the right, sharpen
-Element LEAVES, image rotate freely 90 degrees to the left, image/mirror resize 59%, sharpen
-Element DOODLE1, this one goes behind the flowers, resize 25%, sharpen
-Element BRANCH, resize 68%, sharpen

7-To all the elements apply shadow -6,6, opacity 50, blur 5 color black.

8-The name is done with the font Aquarelle size 72, contour black, fill #2E6Ao4. Shadow to your taste.

9-Layers merge visible. To this layer duplicate three times so that I can apply the filter.

10-Apply the filter Eye Candy 4000/Jiggle.

Values:


Note: the filter is applied in the zones that we want the movement, example of how I did the selections to my image below.

Here:


11-Save as a gif.

.........Second Option..........

1-In order to do this tutorial and leave the image without the animated movement and save it as a png, you must follow these steps.

2-We will do the same as the first tutorial from the number 2 till the 8th, where we will save it as a png, make sure that the option transparency is checked. This is what we will have as a final result, even though you cannot appreciated as well over a white background, it has a background transparent and will stay very well on a colored base.


Thank you all, I hope you liked this tutorial. Greetings, Natty

Translated by Silvia

22:00

Fairy

Publicado por Natty" |


Tutorial realizado con el fantástico Scrap FTU "Hopeful Green", de SCRAPS DIMENSIONS.
Podeis encontrarlo AQUÍ.
Además he utilizado un tubo FTU, de Noflutter http://noflutter.deviantart.com/
Tube AQUI.

Material adicional descargar AQUÍ.
Plugin: Filtro Eye candy 4000/ Jiggle.


Comenzamos"

1- Abrimos un paño transparente de 600 x 600 pixeles y pintamos de color blanco.

2- Abro nueva capa de despliegue, voy a seleccionar/seleccionar todo, copio y pego PAPPER1, quito la seleccion, a esa misma capa le aplico la mascara mkuy", voy a mascaras/ Nueva apartir de una imagen, invertir datos seleccionado y luminosidad de origen marcada. Aplico la mask. luego voy a mascaras/Borrar digo si".

3- Abro una nueva capa de despliegue, voy a seleccionar/ seleccionar todo, copio y pego PAPPER9, quito seleccion, a esa misma capa le aplico la mascara 911_teplate_bylnc", voy a mascara/nueva apartir de una imagen, luminosidad de origen marcada y aplico la mascara, voy a mascaras/Borrar digo si", y en la paleta de capas bajo la opacidad al 60% de esa misma capa.

4- Pego como nueva capa el Frame paisaje1, realisado por mi.

5- Pego como nueva capa el tube de la chica, ver imagen final ubicacion.

6- Ahora pegaremos como nueva capa cada elemento que voy a detallar y se ve en la imagen final.

Elementos redimensionados:

- Elemento FENCE, redimensiono al 70%, Imagen acentuar.
- Elemento GRASS, redimensionado al 50%, Imagen acentuar.
- Elemento FLOWER1, redimensionado al 27%, Imagen acentuar.
- Elemento FLOWER3, redimensionado al 27%, Imagen acentuar.
- Elemento SUNFLOWER2, redimensionado al 27%, Imagen acentuar.
- Elemento LACE RIBBON, redimensionado al 75%, va debajo del frame del paisaje, Borrar con la Herramienta Goma de borrar en la esquina si sobra algo.para quede justa al frame.
- Elemento BUTTERFLY1, Redimensiono al 37%, Imagen rotar al 30% Libre /Izquierda, Imagen /acentuar.
- Elemento BUTTERFLY2, redimensiono al 18%, Imagen rotar al 30%, Libre/derecha, Imagen/acentuar.
- Elementos LEAVES, Imagen rotar 90% libre/Izquierda/Imagen reflejar/ Imagen redimensionar al 59%, Imagen acentuar.
- Elemento DOODLE1, este va por debajo de todas las flores, redimensionar al 25%, Imagen acentuar.
- Elemento BRANCH, REDIMENSIONO AL 68%, Imagen acentuar.

7- A todos estos elementos le he puesto sombra que sobresalga -6, 6, opacidad 50, difuminar 5 color negro. va a gusto.

8- El nombre esta realizado con la Font", Aquarelle al 72, contorno negro, relleno #2E6A04. Sombra a gusto.

9- Fusionamos todas las capas visibles". A esa capa fusionada la Duplico por tres para aplicar el filtro".

10- Ahora aplicaremos el filtro Eye candy 4000/Jiggle.
Valores:

Nota: el filtro se aplicara en las zonas que cada uno quiera seleccionar para que de movimiento, ejemplo de como hice la seleccion en mi imagen debajo.a gusto.
Aqui:

11- Guardamos como imagen gif".


....................Segunda Opcion de Tutorial sin efecto..........................


1- Para relaizar el tutorial y dejar la imagen sin movimiento y guardarla como Imagen PNG", debereis seguir los siguietes pasos.


2- Haremos lo mismo que en el tutorial Primero desde el punto numero 2 hasta el punto numero 8, donde guardamos la imagen como PNG", asegurándonos que tiene la opción de "existe transparencia" marcada. Nos quedara este resultado final, que aunque no pueda apreciarse sobre blanco tiene fondo transparente y quedará muy bien sobre cualquier base de color.


- Gracias a todos, espero les guste. Saludos, Natty.

14:19

Woman Sexy

Publicado por Natty" |


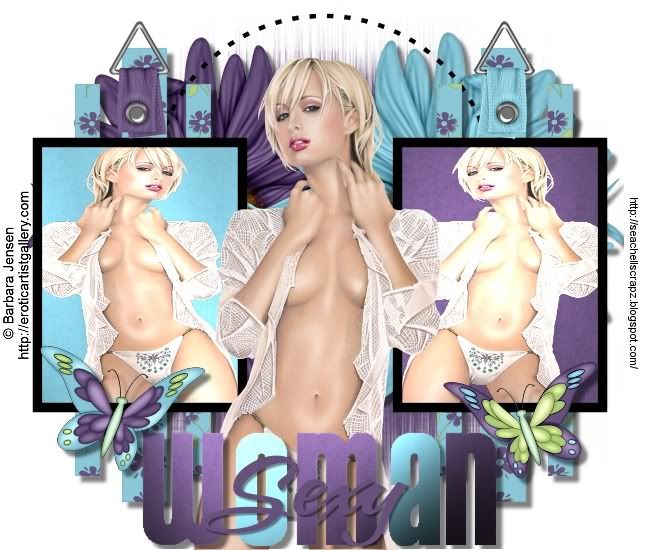
Tutorial realizado con el hermoso Freebie Scrap garden Delight Mini Kit Freebe de Seachel's Scrapz, podeis encontrarlo AQUI.


He utilizado una imagen de Barbara Jensen http://eroticartistgallery.com/ este tubo nos lo regala en está página AQUI ,donde podéis descargarlo junto con dos más.
Material adicional AQUI.
Pluing Graphics Plus/Cross Shadow.


Comenzamos"

1- Abrimos una imagen de 650x550, a la cual pintamos de color blanco.

2- Abrimos una nueva capa de despliegue voy a seleccionar/selecionar todo copio y pego el Paper3. en la selección, quito seleccion.

3- A esa misma capa le aplico la mask gs-mask-circle-030, voy a mascaras/nueva apartir de una imagen, invertir mascara marcado y luminosidad de origen marcado. y aplico la mask, luego voy mascara/Borrar digo si".

4- Voy a las Flores del scrap.

-Flor: Seach-GD-flower5 redimensiono al 70%, imagen/acentuar.

-Flor: Seach-GD-flower6 redimensiono al 70, imagen/acentuar.

-Copio y pego y ubico las dos flores arriba de la mask.ver imagen.

5- Copio y pego como nueva capa el frame2, con la herramienta varita mágica pico sobre los 6 listones del frame que queden seleccionados y copio y pego en la selección el Paper5. quito selección.

6-Copio y pego como nueva capa el frame4, con la herramienta varita mágica me situo en el primer frame y pico en el, que quede seleccionado y copio y pego el paper4, sin quitar selección copio y pego el tube de la chica,imagen/reflejar para que quede mirando hacia el otro lado.quito selección.

7- En el otro frame2 de al lado con la herramienta varita mágica pico sobre el, copio y pego Paper3, sin quitar selección copio y pego el tube de la chica ver imagen final, quito selección.

8- A ese frame ya listo con papeles pegados y tube de la chica le aplico el Filtro Graphics Plus/Cross shadow valores: 50,50,50,50,50,50,50,128.

9- Copio y pego Frame3 borde negro, arriba de los frames de la chica.

10- Copio y pego como nueva capa, tube de la chica tal cual, ver la imagen.

11- Elementos Bukle:

-Seach-GD-bukle3 redimensiono al 20% , Imagen/rotar 180 libre. Imagen/acentuar.

-Seach-GD-bukle2 redimensiono al 20%, imagen/rotar 180 libre. Imagen/acentuar.

-Copio y pego como nueva capa, arriba de los listones de los frames ver imagen colores invertidos.

12- Elementos buterfly:

-Seach-GD-Buterfly1 redimensiono al 30% imagen/acentuar.

-Seach-GD-Buterfly2 redimensiono al 30% imagen/reflejar. imagen reflejar.

-Copio y pego como nueva capa en frame ver imagen final ubicación.

13- Copio y pego frame0 como nueva capa, ver imagen, y copio y pego los templates letras Woman y sexy.

14- Sombra: mariposas, elementos bukle, frames letras.6,6 opacidad50,difuminar5 color negro.

15- Eso es todo espero les haya gustado, cualquier cosa me consultais.


4:59

Woman Sexy

Publicado por Faria |


Tutorial done with the beautiful free scrap Garden Delight mini Freebe from Seachel's Scrapz, you can find it HERE.

I have used an image of Barbara Jensen http://eroticartistsgallery.com/ this tube is given to us for free HERE where you will find two more to download.

Additional material HERE.

Plugin Graphics Plus/Cross Shadow.

Start

1-Open an image 650x550, paint it color white.

2-Open another raster layer/seleccions/select all, copy Paper3 paste into selections, selections none.

3-On the same layer apply the mask gs-mask-circle-030, go to mask, mask from image, invert mask and luminance marked, apply the mask, then mask/delete say yes.

4-Go to the Flowers of the scrap.

-Flower: Seach-GD-flower5 resize 70% of the image/sharpen

-Flower: Seach-GD-flower6 resize 70% of the image/sharpen

-Copy and paste the flowers ontop of the mask, see image.

5-Copy and paste as a new layer in frame2, with the magic wand click on the 6 layers of the frame, keep selected, copy and paste into the Paper5, selections/none.

6-Copy and paste as a new raster layer frame4, with the magic wand click on the first frame, keep it selected and copy and paste into Paper4, without deselecting copy and paste the girl tube, image/mirror so that it is looking the other way, selections/none.

7-In Frame2 click with the magic wand, copy and paste into Paper3, without deselecting, copy and paste the girl tube, see final image, selections/none.

8-The frame all done with all papers done and the girl tube, apply Filter Graphics Plus/Cross Shadow, values 50,50,50,50,50,50,50,128.

9-Copy and paste Frame3 border black, ontop of the frames of the girl tube.

10-Copy and paste as a new layer, girl tube as is, see the image.

11-Elements Bukle:

-Seach-GD-bukle3 resize 20% of the image, image/free rotate 180. Image/sharpen.

-Seach-GD-bukle2 resize 20% of the image, image/free rotate 180. Image/sharpen.

-Copy and Paste as a new layer, ontop of all the frames see image, colors/inverted.

12-Elements Butterfly:

-Seach-GD-Butterfly1 resize 30% of image, image/sharpen.

-Seach-GD-Butterfly2 resize 30% of image, image/mirror.

13-Copy and paste frame0 as a new layer, see final image, copy and paste the letter templates Woman and sexy.

14-Drop Shadow applied to: elements bukle, letter frames at 6,6 opacity 50, blur 5 color black.

I hope you enjoyed this tutorial, you may consult with me with any questions. Natty

Translated by Silvia

6:54

WARM SPRING

Publicado por Faria |


Tutorial done with the beautiful Scrap (Blue Feelings) from Doris Lynch, you can find it HERE thank you Doris.

I have used an image of Al Rio http://www.alrioart.com/, for use it is necessary to obtain a lincese and adquire at
CILM.

Additional material download HERE (Do not use in any other tutorial without my permission, thank you.)

Start:

1-Open a new image 600x600 fill it with the color white.

2-Open a new raster layer, go to selections/select all, copy and paste the image the Paper color celeste, paper number4.

3-To this layer we will apply the mask Becky_Mask038, go to mask/new from image, source of luminance checked and apply it. Masks/delete, say yes.

4-The rest is to place all the elements and resize them, as you see in the image. Do not forget to sharpen when you resize them. Frame resize 95% of the original, branches of the flower celeste are two, image/mirror behind the frame and one to the front of the frame resized at 80% of the image. The big blue Flowers behind the frame resized at 60% of the original, Big blue Flowers resize 60% of original place two behind frame. Butterfly celeste metal two of them resize at 54%. Image/mirror so you can place it at the text. Dragonfly resize 28% of original, butterfly celeste at 30% of original place in the branch of the girl tube, elements of the scrap must put copy.

5-Drop Shadow to all the elements of the image, values: Vertical-4, Horizontal4, Opacity 44, Blur 5, Color Black.

Hope you enjoyed this tutorial, any questions please consult with me.

Greetings!! Natty

Translated by Silvia

6:52

Warm spring

Publicado por Faria |


Tutorial realizado con el hermoso Scrap (Blue Feelings) de Doris Lynch, podéis encontrarlo AQUÍ. Gracias Doris.
He utilizado una imagen de Al Rio http://www.alrioart.com/, para usarlo es necesario obtener la licencia y adquirirlo en (CILM).
Material adicional puede descargarse AQUI (No utilizar en otros tutoriales sin mi consentimiento gracias).

COMENZAMOS:

1- Abrir una nueva Imagen de 600 x 600 y pintamos de color Blanco.

2- Abrimos Nueva Capa de Despliegue, vamos a Seleccionar/ Seleccionar todo, Copio y pego en la Imagen el Papel color celeste papper numero 4.

3- A esa Capa le Aplico la Mascara Becky_Mask038", Voy a Mascaras/Nueva a partir de una imagen, Luminosidad de origen marcado, y aplico. voy a Mascaras/Borrar digo si".

4- Lo demás es ubicar los elementos del Scrap redimensionandos, como se ven en la Imagen, no olvidesis de cuando redimensionas ir a Efectos/acentuar/Acentuar, Frame redimensiono al 95%, Ramas con flor celeste son dos, Imagen/reflejar detrás del frame uno y otro delante del frame al 80%, Flores Azules Grandes detrás del frame al 60% dos, Flores celestres grandes detrás del Frame al 60% dos , Mariposa celeste de metal dos al 54% Imagen/reflejar para ubicarlas en el texto, Libélula al 28% , mariposa Celeste al 30% en la rama del tube de la chica,elementos del scrap al cual deben poner su copy.


5- Sombra para todos los elementos de la imagen valores: Vertical -4 , Horizontal 4, Opacidad 44, Disfuminar5 color Negro.


Espero que os haya gustado, cualquier duda me la consultáis. Saludos!!! Natty

6:27

Sentiment

Publicado por Faria |


Tutorial done with the gorgeous Scrap TIMELESS of Doris Lynch, you can find it HERE. Thank you Doris.
I have used an image tube from Ken Martin http://www.artofkenmantin.com/ artist FTU. You can download the tube HERE.

Necessary materials, download HERE.

Start:

1-Open a transparent image 600x600 pixels, fill with color white.

2-Open a new raster layer, go to selections/select all, copy and paste PAPER N7 and apply this same layer and apply the mask Cid-, mask/from image/luminosity checked apply the mask, mask/delete say yes.

3-Copy and paste as a new layer the TEMPLATE3.

4-Copy and paste as a new layer the TEMPLATE2, resizing to 90%, effects/sharpen/sharpen on top of the template n3, drop shadow to your liking.

5-Layers merge visible, save as a psp. Later to work with animation, rename FUSION1.

6-Copy and paste as a new layer TEMPLATE N 1 Heart, resizing to 70%, effects/sharpen see the image, close all the layers except the TEMPLATE 1 Heart, now with the magic wand click inside the template 1 Heart, now it is selected, copy and paste the girl tube, selections/none. Drop Shadow to your liking. Save Template n 1 Heart as a psp image, rename FUSION N2 (with the heart we will work later in animation shop).

7-We will keep working on the image, now we will place the rest of the elements. Girl tube do not resize, give credit. Flowers, TULIP there are 3, resize them all 50%, Flower, TULIP N3 rotate free 30 percent. Flower r TULIP N2 rotate 20% to the right. Flower N3 resize 40%, FLOWER N3, two little ones resize 20%. Do not forget to give credit to the girl tube, scraps TIMELESS.

8-Name it Sentiment, font TKDoodle, size 74, contour #A8BCC3, inside fill #6D6D82.

9-Drop Shadow to your liking. Once placed the elements, layers merge visible. Rename FUSION N3, save as a psp image,

10-We should have saved now FUSION N1, FUSION N2, FUSION N3, if you have done the steps correctly. Now we will go to animation.

Animation:

Open the saved images. FUSION N1 will be the base of the image. Open FUSION N2, it is the heart with the image of the girl. Open FUSION N3, these are the elements that will go ontop of the final image.

1-Click on the FUSION N2 HEART and do this:


2-I have left 14 frames, delete the first one so that it does not jump when we go to animation. I have left now 13 frames.

3-Now go to FUSION N1 duplicate 13 frames. Select all.

4-Situate it on FUSION N2 HEART WITH ANIMATAION, select all and copy/paste on top of FUSION N1. See image.

5-Duplicate 13 layers FUSION N3, copy and paste on top of the finished image.

6-Done, you could optimize and save as GIF image.

I hope you enjoyed my tutorial, any questions feel free to consult with me. Greetings!!!!! Natty

Translated by Silvia

6:25

Sentiment

Publicado por Faria |


Tutorial realizado con el hermoso Scrap TIMELESS de Doris Lynch, podéis encontrarlo AQUÍ. Gracias Doris.
He utilizado una imagen de Ken Martin http://www.artofkenmartin.com/ artista FTU. puedes descargar el tube AQUÍ.
Material adicional puede descargarse AQUÍ.


Comenzamos:

1- Abrimos un paño transparente de 600 x 600 pixeles. pintamos de color Blanco.

2- Abrimos una nueva capa de despliegue, voy a seleccionar/seleciono todo, copio y pego PAPPER N7,a esa misma capa le aplico la Mask Cid-, voy a Mascaras/nueva apartir de una imagen,tildando luminosidad de origen y aplico la mask, ahora mascaras/borrar digo si".

3-Copio y pego como nueva capa el TEMPLATE N 3.

4-Copio y pego como nueva capa , TEMPLATE N 2. redimensionado al 90%, Efectos/acentuar/acentuar. arriba del template n3.Sombra a gusto.

5- Fusiono todas las capas visibles" y esa fusion la guardo como imagen psp". para luego trabajar en el animation, Nombrarla como FUSION N 1.

6- Copio y pego como nueva capa TEMPLATE N 1 Corazon, redimensionado al 70%, Efectos/acentuar. ver imagen ubicacion, cierro demas gafitas en la paleta de capas y me situo en el TEMPLATE 1 Corazon, ahora con la Herramienta varita magica pico dentro del template 1 Corazon , queda seleccionado, copio y pego Tube de la chica , tal cual, quito seleccion. Sombra a gusto" Guardo el Template n 1 Corazon como imagen psp" lo nombro FUSION N2" (con el corazon trabajaremos luego en el animation).

7- Seguimos Trabajando en la imagen, Ahora queda ubicar los demas elementos.Tube de la chica a su tamaño natural.(poner su copy).Flores, TULIP son 3 Redimensiono al 50% las tres.Flor, TULIP N3, Cerrado rotar al 30% Libre a la Derecha.Flo,r TULIP N2, abierto rotar al 20% Libre Izquierda.Flor, FLOWER N3 una redimensiono al 40%.Flores,FLOWER N3 dos pequeñas redimensiono al 20%.No olvidar el copy del tube y el copy del Scrap TIMELESS.

8- Realisaremos el nombre Sentiment, Font TKDoodle, al 74 tamaño, Contorno #A8BCC3. Relleno #6D6D82.

9- Sombra que sobresalga a gusto. Una vez ubicados los elementos que nombramos aqui, Fusionamos todas las capas visibles" Nombro como FUSION N3. y guardo la fusion como imagen psp"
10- Deben quedarnos guardadas como imagenes psp" FUSION N1, FUSION 2, FUSION 3. si ha seguiso mis pasos Para trabajar ahora en el animation.

Animation:

Abro las imagenes guardas. FUSION N1, que sera la base de la imagen.Abro FUSION N2 que es el corazon con la imagen de la chica.Abro FUSION N3 que son los elementos que iran arriba de la imagen final.

1- Me situo en la FUSION N2 CORAZON, y hago esto.


2- me quedan 14 frames, Borro el primero asi no queda ese salto cuando vemos la animacion.me quedo con 13 frames.


3- Ahora voy a la FUSION N1 y duplico por 13 frames. todos seleccionados.

4- Me situo en la FUSION N2 CORAZON CON ANIMACION selecciono todo copio y pego encima en la FUSION N1. ver imagen ubicacion.

5 - Duplico por 13 capas la FUSION N3 Copio y pego encima en la imagen final.

6- Listo podeis Optimisar y guardar como imagen GIF".

Espero les haya gustado, cualquier duda me la consultais. Saludos!!! Natty

6:12

ANGEL

Publicado por Faria |


Tutorial done with the beautiful Scrap TIMELESS of Doris Lynch, you can find it HERE . Thank you Doris.

I have used an artist tube of Artman http://www.artman.com/ artist FTU you can find it HERE.

Additional material you can download HERE.

Plugin Effect Graphic Plus/Cross Shadow.

Start:

1-Open a new raster layer 600x600. Color it white.

2-Open a new raster layer, go to selections/select all, copy and paste PAPPER N8, selections none.

3-To that same layer apply the Mask Cid go to masks/from an image luminosity checked and apply, then masks delete/say yes.

4-Now resize the FRAME WRAP 2 to 80% and go to effect/sharpen, copy and paste as a new layer, close the layers and situate yourself on FRAME with the magic wand click on the frame, go to selections/modify/expand 2 pixels.

5-Copy and paste PAPER n6. Selections none.

6-Copy and paste the girl tube on top of the frame and place it. See image.

7-Now paste the elements:

Flor FLOWER1 resize 60% and paste 3 flowers.
Flor FLOWER1 resize 30% and paste 4 flowers.
Flor FLOWER2 resize 30% and paste 2 flowers.
Flor FLOWER2 resize 15% and paste 5 flowers.

Note: to all the elements resized go to effect/sharpen.

See the image so you can see where to place the flowers.

8-Resize the BLING1 20% Image/mirror, effect/sharpen, copy and paste as a new layer.

9-Now resize FEATHER1 40% Image/mirror, effect/sharpen, copy and paste as a new layer.

10-Now resize FEATHER2 30% Image/mirror, effect/sharpen copy and paste as a new layer.

11-Now resize BUTTERFLY1 30% Image/rotate freely 30 degrees to the left. Effect/sharpen. Copy and paste as a new layer.

12-Shadow: -4,4,opacity 50, blur 5. Color black.

13-Place the name Angel, font Cigno to 110, contour #4C4B7B. Fill #C1C1E3.

14-To the name I applied Filter Graphics Plus/Cross Shadow, values leave as is.

I hope you enjoyed, any questions feel free to ask.

Natty

Translated by Silvia