5:12

St Patrick Day

Publicado por Gely |


Tutorial made with the lovely scrap ST Patty's Day by Sharon's
Creations you can get it HERE.
Tube of your choice.
Template and mask HERE

1 .- Open new white image 750x650

2 .- New raster layer, selections/select all, apply the paper 1, new mask layer /
from image and apply the mask.
3 .- Copy and paste the shamrocks 1 and 2 and paste into the image.
4 .- Open the template 1 copy and paste as a new layer into the image, selections/
select all/float paste the paper 5, with the select tool,
select part of the top to the paper 28,
paste as new layer
select inside the template with the magic wand,
selections / invert, make the paper layer active and delete.
See the example bellow:


5 .- Copy and paste the template 2, select inside with the magic wand and paste the
paper 9 do the same with the template 3 but
with the paper 6.
6 .- Paste the element 18 as a new layer and write THE LUCK OF THE IRISH
ST PATRICK DAY with this colors #3d7a3e #10330b and the gradient
foreground-background, effects / texture effects / straw wall with this Settings:


7.- Copy and paste other elements and your tube of choice, apply effects/drop shadow
Settings: -4,4,81,7,25.
8.- Put your name and copys, merge all and save.

Easier right? Thanks for doing my tutorial!!

4:44

St Patrick Day

Publicado por Gely |


Tutorial realizado con el lindo scrap de Sharon's
Creations puedes adquirirlo AQUI.
Tubo de tu gusto.
Template y mascara AQUI

1.- Abrimos una imagen 750x650 y la pintamos de blanco.
2.- Nueva capa seleccionar todo y aplicamos el papel 1, nueva a capa
de mascara/a partir de una imagen y aplicamos la mascara.
3.- Copiamos y pegamos los tréboles 1 y 2 y los pegamos en la imagen.
4.- abrimos el template y copiamos y pegamos la capa 1 selecciones/
seleccionar todo, nueva capa pegamos el papel 5, seleccionamos
una parte de arriba del papel 28, pegar/pegar como nueva capa,
seleccionamos el interior del template con la varita mágica, , selecciones/invertir
volvemos al papel y eliminamos el sobrante.
Mira el ejemplo de abajo


5.- Copiamos y pegamos la capa del template 2 seleccionamos con la varita
mágica y pegamos el papel 9 hacemos lo mismo con el template 3 pero
pegamos el papel 6.
6.- Pegamos el elemento 18 y escribimos las letras THE LUCK OF THE IRISH
y ST PATRICK DAY con estos colores #10330b y #3d7a3e las de en medio: gradiente
primer plano y segundo, efectos/efectos de textura/paja, valores:


7.- Pegamos los demas elementos y el tubo de tu eleccion le aplicamos sombra con estos
valores: -4,4,81,7,25.
8.- Ponemos nuestro nombre y copys y listo!!

FACIL VERDAD? GRACIAS POR HACER MI TUTORIAL!!

23:24

SWEET PIRATE

Publicado por Gely |


Tutorial made with the lovely Scrap FTU BABE GRUNGE by Scrap DIMENSIONS,
you can find it HERE. Thanks Doris.
I used a tube from NoFlutter you can download it HERE
Other materials HERE

1 .- Open a new image 650x640 and paint it white.
2 .- New raster layer Selections / select all and paste the paper6 new mask layer / from
image, apply the mask, merge group, image / resize to 120%
select none.
3 .- Copy and paste the layer 6 of the template and with the magic wand select inside
and paste the papel8, unselect
4 .- Copy and paste the layer 5 of the template selections / select all / float
new layer, paste the papel10, layers / duplicate then multiply.
5 .- paste the doodle2 and then duplicate.
6 .- Copy and paste the flower 6, resize 50% duplicate one times.
7 .- paste layer 2 of the selected template with the magic wand and paste
unselect the papel3.
8 .- Copy and paste the layer 3 of the template, select with the magic wand
and paste the papel10 apply shadow with these settings: -4,4,81,5 do it again
but now with this settings, 4 -4,81,5 now effects / effects 3d/inner bevel
with these values:


9 .- Select the template with the magic wand and paste the boat image.
10.- copy and paste the element brad1 resize 65% and select inside with the
Selection tool / ellipse new layer, select
part of the boat image and paste into the selection,
opacity 57.
11.- Copy and paste the flower5 resize to 28% and duplicate, the flower3
resize to 20% and flower1 30% the leaf resize to 30% duplicate, image/mirror.
12.- The skull resize to 40%, butterflies to 30%, and the girl resize to 80%
13.- Apply shadows to all elements, write SWEET PIRATE with any font you want.
I used the font Blackadder, add your name and any copyrights and that's it!!
Thanks for doing my tutorial!!
Hugs, Gely.

22:48

SWEET PIRATE

Publicado por Gely |


Tutorial realizado con el lindo Scrap FTU GRUNGE BABE de SCRAPS DIMENSIONS,
puedes descargarlo AQUÍ. Gracias Doris.
Utilize un tube de NoFlutter puedes descargarlo AQUI
Otros materiales AQUI


1.- abrimos una imagen de 650x640 y lo pintamos de blanco.
2.- nueva capa selecciones/seleccionar todo y pegar el papel6, nueva capa de mascara/apartir de una
imagen, aplicamos la mascara, fusionar grupo, imagen/redimencionar al 120%
deseleccionar.
3.- copiamos y pegamos la capa 6 del template seleccionamos con la varita magica
y pegamos el papel8, deseleccionar
4.- copiamos y pegamos la capa 5 del template selecciones/seleccionar todo/flotar
nueva capa, pegamos el papel10 capas/multiplicar luego duplicamos.
5.- pegamos el doodle2 y lo duplicamos.
6.- copiamos la flower 6 y pegamos, imagen redimencionar 50% duplicamos 2 veces.
7.- pegamos la capa 2 del template seleccionamos con la varita magica y pegamos
el papel3 deseleccionar.
8.- copiamos y pegamos la capa 3 del template, seleccionamos con la varita magica
y pegamos el papel 8 aplicamos sobra con estos valores: -4,4,81,5 volvemos a
aplicar la sombra con estos valores 4,-4,81,5 efectos/efectos 3d/bisel interior
con estos valores:


9.- seleccionamos el template con la varita magica y pegamos la imagen del barco.
10.-copiamos y pegamos el elemento brad1 redimencionamos 65% y seleccionamos el
el interior con la herramienta selecion/elipse nueva capa, seleccionamos
parte de la imagen del barco y pegamos en el interior de la seleccion, bajamos
la opacidad a 57.
11.-copiamos y pegamos la flower5 redimencionamos al 28% y duplicamos, la flower3
redimencionamos al 20% y la flower1 al 30% el elemento leaf3 lo redimencionamos
30% duplicar, imagen espejo.
12.-el elemento skull redimencionamos al 40%, las mariposas al 30%, la chica la redimencionamos al 80%.
13.- aplicamos sombra a todos los elementos
alguna font yo utilize blackadder escribimos SWEET PIRATE, ponemos nuestro nombre,
copys y listo!!
Gracias por hacer mi tutorial!!
Besos Gely.

7:51

DESIRE

Publicado por Gely |


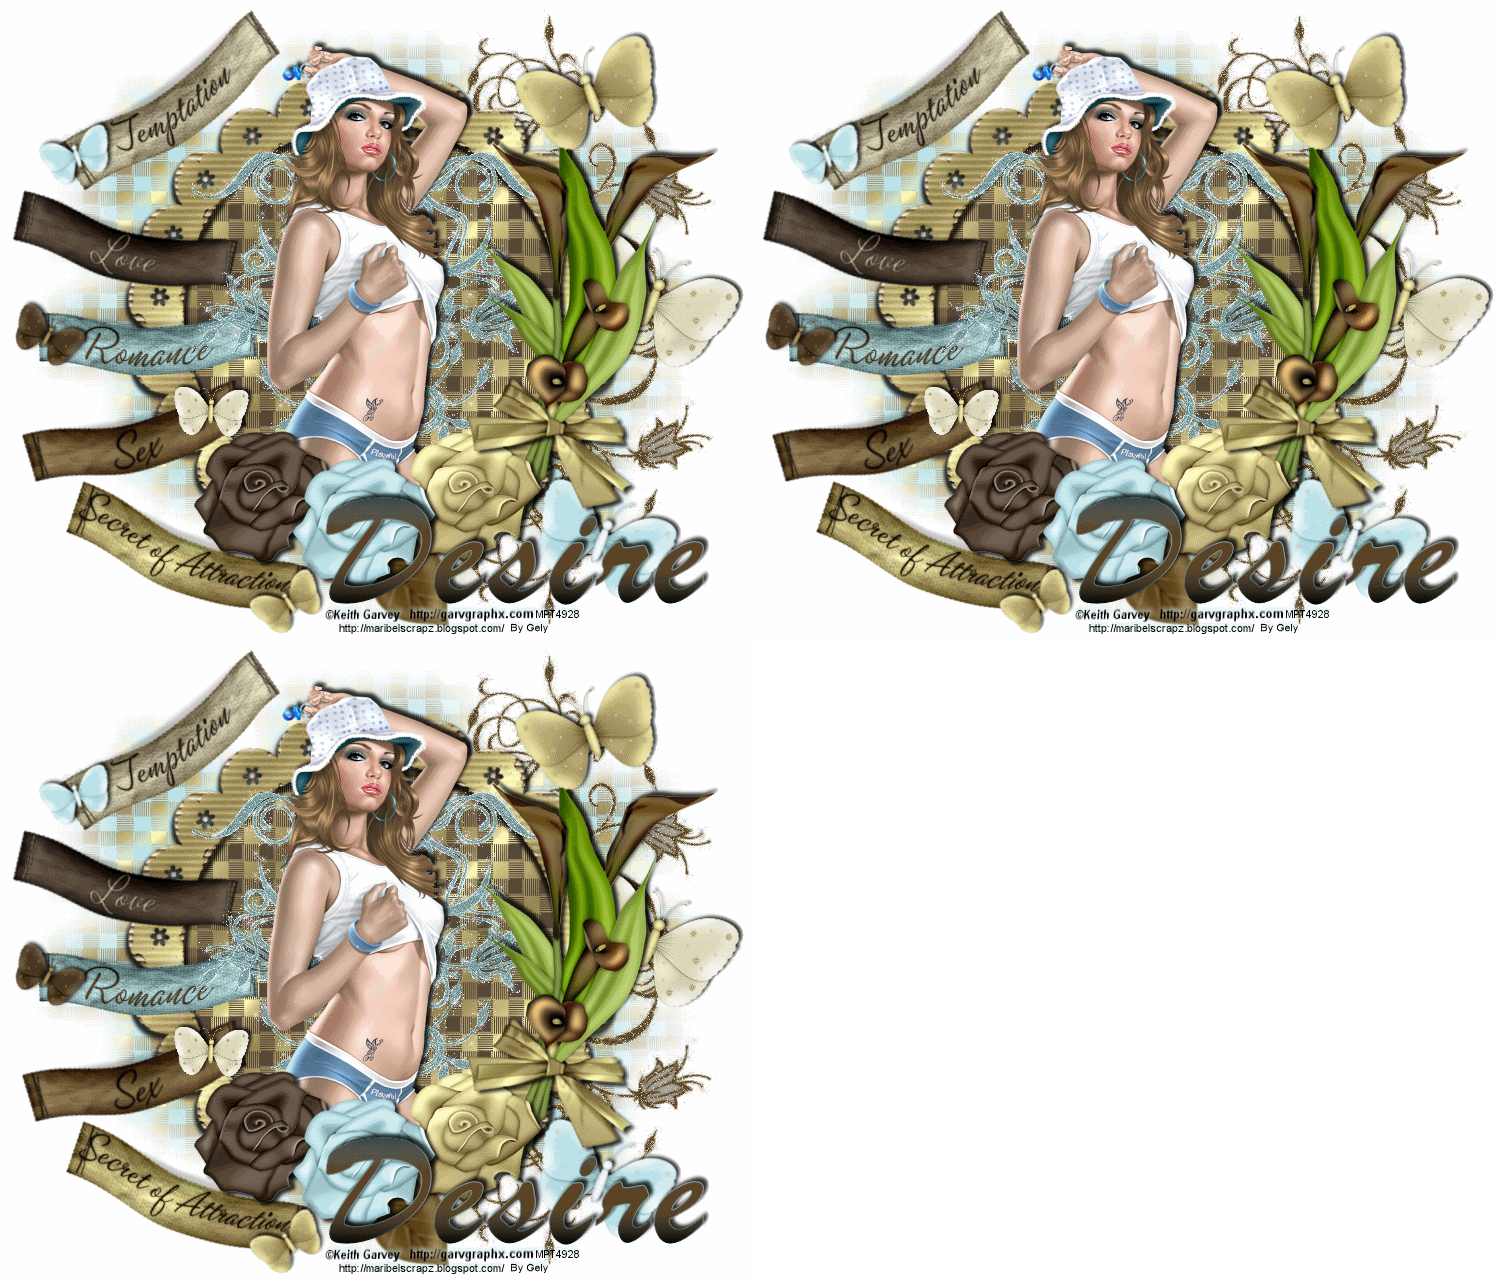
Tutorial made with the beautiful Scrap Secret of Attraction by Maribel's Scrapz, You can purchase this gorgeous kit HERE. Thanks Maribel.

I used a tube from Keith Garvey, you can purchase his tubes HERE

masks: HERE

Plugins required: xenofex/constellation.


1 .- Open a new image 750 x 640 flood fill white.
2 .- New raster layer Selections / select all, paste paper 6 onto selection, select none
New mask layer / from image, apply the mask, merge/merge group
3 .- Copy and paste the element floraldeco 3 duplicate 2 times image/ flip, merge and duplicate 2 times, now we have 3
Click on the floraldeco3 go to effects plugins alien skin xenofex 2 constellation and apply these settings:


Click on copy floraldeco3 apply the same settings but click the random button 1 time, again click on copy2
floraldeco3 and do the same as above
4 .- Copy and paste the frame5 resize to 80% with the magic wand, select inside the frame
copy part of the paper 4 and paste inside the frame.
5 .- Tags 2,3,5, resize to 55%, the tags 1 and 4 to 60% and butterflies 1,2,3 and 4 20%, copy
and paste the calllilies2, copy and paste the bow and resize 70% butterflies 1,3 and 4 to 40%
copy and paste rose 1,3 and 4 resize the leaf 2 to 70%
6 .- Copy and paste in the center floraldeco2 duplicate 2 times, picture / mirror then merge these two layers
image / flip duplicate 2 times, now we have 3, apply the filter xenofex / constellation with the values
above, click the random on each layer.
7 .- Copy and paste the girl tube, type the text, add shadows to all elements,
add your name and any copyrights.
8 .- Merge tags 2,3 and 4 and drag behind the floraldeco2, merge the girl, butterflies, flowers,
the floraldeco2, the callalilies, the bow and the text, like this:


9 .- Close the visibility of two of the floraldeco2 and floraldeco3 copy and paste in animation and
repeat twice with the others floraldeco until you have 3 in the animation, save as gif and you're done!
Thanks for doing my tutorial!!
Hugs Gely.

7:15

DESIRE

Publicado por Gely |


Tutorial realizado con el hermoso Scrap PTU Secret of Attraction de Maribel's Scrapz,
puedes adquirirlo AQUÍ. Gracias Maribel.

He utilizado el trabajo del artista PTU Keith Garvey, puedes comprar sus tubes aqui AQUI.

Mascara: AQUI

Plugins necesarios: xenofex/constellation

1.- Abrir una imagen de 750 x 640 pintamos de blanco.
2.- Nueva capa selecciones/seleccionar todo pegar el papel 6, nueva capa de mascara/apartir de una imagen y
seleccionamos la mascara, deseleccionar.
3.- Copiar y pegar el elemento floraldeco 3 duplicar imagen/voltear, fusionar y duplicar 2 veces, ahora tenemos 3
aplicamos a las tres capas el filtro Xenofex/constellation, con los valores de abajo valores y aplicando
el random a cada capa:


4.- Copiamos y pegamos el frame 5 redimencionamos al 80% con la varita magica seleccionamos el interior del frame
seleccionamos una parte del papel 4 copiamos y pegamos en el marco.
5.- Los tags 2,3,5, redimencionarlos al 55%, los tags 1 y 4 al 60% y las mariposas 1,2,3 y 4 al 20%, copiamos
y pegamos la calllilies2 copiamos y pegamos el moño y lo redimencionamos al 70% las mariposas 1,3 y 4 al 40%,
copiar y pegarlas rosas 1,3 y 4 redimencionar la hoja 2 al 70%
6.- Copiar y pegar en el centro el floraldeco2 duplicamos, imagen/espejo luego fusionamos esas dos capas
imagen/voltear y duplicar 2 veces, ahora tenemos 3, aplicamos el filtro xenofex/constellation con los valores
mencionados arriba.
7.- Copiamos y pegamos el tube de la chica, y ponemos el texto Desire, agregar sombra a todos los elementos,
firmamos y ponemos los copys.
8.- Fusionamos los tags 2,3 y 4 y los ponemos detras de el floraldeco2, fusionamos las mariposas, la chica, las flores,
el floraldeco2, las callalilies, el moño y el texto nos quedara de esta manera:


9.- Cerramos las gafitas de dos de los floraldeco2 y del floraldeco3 copiamos y pegamos en el animation y asi lo haremos con las demas asta quedarnos 3 capas en el animation guardamos como gif y listo!!

Gracias por hacer mi tutorial!!

Gely.

20:39

SECRETS

Publicado por Gely |


Tutorial made with the beautiful Scrap by Maribelscrapz, You can purchase
this gorgeous kit HERE. Thanks Maribel.

I am using the awesome art of Chester Ocampo, tube HERE.

Masks: HERE

Ready!! let's go!!


1.- Open an image 650 x 600 and flood fill white.
2.- New raster layer selections-select all, copy and paste paper4, select none
new mask layer-from imagen and put the mask81 merge-merge group, image-resize 110%
3.- Repeat step two but with the paper3 and mask9
4.- Copy and paste element5 resize 60%, select inside with the magic wand
Selections-modify-expand-10, new raster layer copy and paste the papel4.
5.- Copy and paste the element3 resize 50% with the magic wand select inside
Selections-modify-expand-10 new raster layer and paste the papel10, opacity 65%.
6.- Copy and paste the element1 resize 50% with the magic wand select inside
Selections-modify-expanding 10 new raster layer and paste the papel9, opacity 65%
7.- Elements 29,34,36,13 resized to 50%
Element 14 resized to 50% mirror image
Element 28 resized to 40%
Element 32 resized to 60%
Element 9 resized to 20%
Element 18 resized to 90%
Element 23 resized to 70%
8.- Copy and paste the girl, with the warp brush apply in the legs behind the doodle.
9.- Drop-shadow all the layers.
10.- Write secrets with the font you like it, apply effects-3d effects-inner bevel whit this values:


11.- Add your name and any copyrights, merge all layers and ready!
I hope you enjoyed, any questions I'll be here!!

20:24

SECRETS

Publicado por Gely |


Tutorial realizado con el hermoso PTU Scrap PANDORA de Maribelscrapz
puedes adquirirlo AQUÍ. Gracias Maribel.

He utilizado el fantastico arte de Chester Ocampo, tubo AQUI.
Mascaras: AQUI

Comenzamos:

1.- Abrir una imagen de 650 x 600 y pintarlo de blanco.
2.- Nueva capa selecciones-seleccionar todo pegar el paper4 deseleccionar,
mascara-apartir de una imagen y ponemos la mask81 fusionar-fusionar grupo imagen-redimencionar-110%
3.- Hacemos lo mismo que el paso 2 pero con el paper3 y la mask79.
4.- Copiar y pegar elemento 5 y redimencionar al 60% con la varita magica seleccionar el interior
selecciones-modificar-expandir-10 nueva capa y copiamos y pegamos el papel4.
5.- copiamos y pegamos el elemento3 redimencionamos al 50% con la varita magica seleccionar el interior
selecciones-modificar-expandir-10 nueva capa y pegamos el papel10, opacidad 65%
6.- Copiar y pegar el elemento1 redimencionar al 50% con la varita magica seleccionar el interior
selecciones-modificar-expandir-10 nueva capa y pegar el papel9, opacidad 65%
7.- Elementos 29,34, 36,13 redimencionar al 50%
Elemento 14 redimencionar al 50% imagen-espejo
Elemento 28 redimencionar al 40%
Elemento 32 redimencionar al 60%
Elemento 9 redimencionar al 20%
Elemento 18 redimencionar al 90%
Elemento 23 redimencionar al 70%
8.- Copiar y pegar la chica, con el pincel deformar poner las piernas detras del doodle.
9.- Escribir el texto secrets con alguna font de tu gusto, efectos3d/bisel interior con estos valores:


10.- Firmarlo, poner los creditos correspondientes y listo!!
Espero que les haya gustado, cualquier pregunta aqui estare!

19:03

Lovely

Publicado por Gely |

Tutorial made with the beautiful Scrap SWEET VALENTINE by Doris Lynch, You can purchase
this gorgeous kit HERE. Thanks Doris.

I'm using a tube from Josh Howard, tubes HERE.

Mask: HERE

Lets begin:

1 .- Open a new image 670 x 520 flood fill white.
2 .- New raster layer selections / select all and paste the paper7 into selection, select none.
3 .- New mask layer/ from image, apply the mask merge/merge group.
4 .- Place the bling on the top to the left then duplicate 3 times image / mirror
another bling image / mirror / flip, and the last bling image / flip, copy and paste
the element rose frame resize 90%, new raster layer, select inside of
Heart with magic wand selection / modify / expand 4, make the new layer active, copy and paste paper1 drag this layer
under heart, copy and paste the box resize 55%
copy and paste the window, resize 30%, copy and paste flower3 resize 45%,
place it on the top to the right behind the window, duplicate image / mirror, copy and paste
doodle as new layer resize 40% put it on the top to the right, duplicate image/ mirror,
copy and paste branch resize 80% duplicate image /mirror and place behind the rose frame,
copy and paste flower1 as new layer resize 25% the flower2 30%, copy and paste butterfly1 and 2
as new layer resize 25% copy and paste daisy1 as new layer resize 60% drag this layer under the
window, then type the text lovely with any font you like.
5 .- Drop-shadow all the layers settings below
V&H-2
opacity-60
blur-7
Color black
Add your name and any copyrights.
6 .- New raster layer, click inside of window with magic wand selection/
modify / expand 1, make the new layer active, open the box and select inside with the tool selection/
rectangle copy and paste in the new layer, select the girl's face copy and paste the selection as
new layer apply luminance, layers merge all, add drop-shadow settings above
but with this color #6a020 save.

Hope you enjoyed it, thanks for doing my tutorial.
Greetings, Gely.


17:06

Lovely

Publicado por Gely |


Tutorial realizado con el hermoso Scrap SWEET VALENTINE de Doris Lynch, 
puedes adquirirlo AQUÍ. Gracias Doris.

He utilizado el trabajo del artista Josh Howard, tubos AQUI.

Mask: AQUI

 Comenzamos:

1.- Abrir una imagen de 670 x 520 y pintarla de blanco.
2.- Nueva capa, selecciones/seleccionar todo y pegar el paper7 quitamos seleccion.
3.- Abrimos la mascara nueva capa de mascara/apartir de una imagen quitamos seleccion.
4.- Ahora todo lo que vamos a hacer es copiar, pegar y redimencionar elementos. Colocamos  
    el bling en la parte superior izquierda duplicamos 3 veces luego imagen/espejo 
    a otro imagen/espejo/voltear y al ultimo imagen/voltear, el elemento rose frame
    rediemncionarlo al 90%, nueva capa, tomamos la varita magica y seleccionamos dentro del 
    corazon selecciones/modificar/expandir #pixeles 4 y pegamos el paper1 lo ponemos detras del 
    corazon, el elemento box redimencionarlo al 55% acomodarlo como en la imagen,
    el elemento window rediemncionarlo al 30%, flower3 redimencionamos 45% la acomodamos 
    en la parte superior derecha detras de la ventana, duplicar imagen/espejo, doodle 
    redimencionamos al 40% acomodamos en la parte superior derecha y duplicamos imagen/espejo,
    el elemento branch rediemncionar al 80% duplicar imagen/espejo colocarla detras del rose frame,
    flower1 redimencionamos al 25% y la flower2 al 30% butterfly1 y 2 redimencionarlas al 25% daisy1
    redimencionarla al 60% y acomodarlas detras del window, escribir el texto lovely con alguna
    font de tu gusto.
5.- Poner sombra a todos los elementos con estos valores 
V&H-3
opacidad-81
desenfoque-5
Color negro.
    Ponemos los copys correspondientes.
6.- Nueva capa nos colocamos en la ventana y seleccionamos con la varita magica el interior selecciones/
    modificar/expandir 1, abrimos el elemento box y copiamos el interior con la herramienta seleccion 
    copiamos y pegamos en la nueva capa, selecionamos la cara de la chica, 
    pegamos y copiamos en la seleccion como nueva capa aplicamos luminocidad, fusionamos todo y agregamos
    sombra con los valores mencionados arriba pero con este color #6a020 y guardamos.

Espero que les haya gustado, gracias por hacer mi tutorial.
Saludos, Gely.