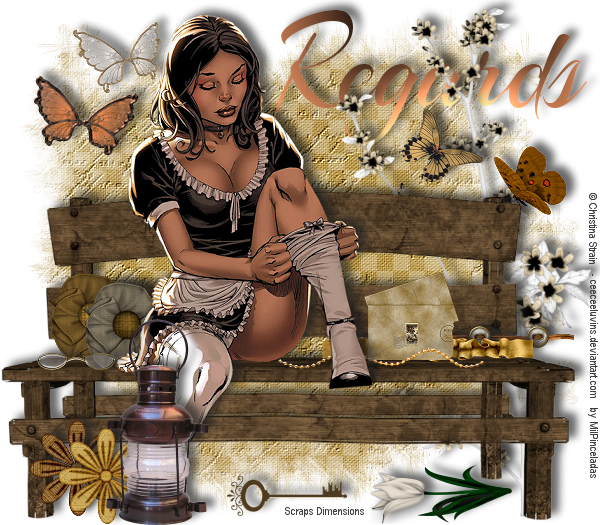
Tutorial made with the fantastic FTU scrap **Nostalgia**, of Scraps Dimensions, by Doris Lynch. You can get it HERE.
I used a tube of artist Christina Strain-ceeceeluvins.deviantart.com. You can download HERE.
Mask download HERE.
Start:
1 - Open a transparent layer 600 x 525 pixels. Paint it white, color: # FFFFFF.
2 - SD NOSTALGIC PAPER 4. Image- Rezise, size in pixels, width 6000, height: 600 pixels. Edit-Copy. Edit-Paste as new layer.
Apply the mask WSL_ Masck297. New masks, from image. Masks-Delete. We apply the plug-in FM Tile Tools, effect:
emboss Blends, 2 times. See capture. 
3 - SD NOSTALGIC Bench. Image- Resize, 74% of the original. Edit-Copy. Edit-Paste as new layer.
4 - TUBE GIRL. Image- Image- Resize, 70% of the original. Edit-Copy. Edit-Paste as new layer.
5 - SD LANTERNA NOSTALGIC. Image- Resize, 27% of the original. Edit-Copy. Edit-Paste as new layer.
6 - BRANCH 2 SD NOSTALGIC. Image- Resize, 70% of the original. Edit-Copy. Edit-Paste as new layer. Align the end of the stem
with the leg of the bench.
7 - SD NOSTALGIC FLOWER 3 and 4. Image- Resize, 12% of the original. Edit-Copy. Edit-Paste as two new layers.
8 - SD NOSTALGIC GLASSES. Image- Resize, 15% of the original. Edit-Copy. Edit-Paste as new layer.
9 - SD NOSTALGIC ENVELOPE 2. Image- Resize, 13% of the original. Edit-Copy. Edit-Paste as new layer.
10 - SD NOSTASLGIC BUTTONS. Image- Resize, 40% of the original. Edit-Copy. Edit-Paste as New Layer.
11 - SD NOSTALGIC BEADS. Image- Resize, 30% of the original. Edit-Copy. Edit-Paste as new layer.
12 - SD NOSTALGIC FLOWER 1 and 2. Image- Resize, 15% of the original. Image- Mirror. Image-rotate 180º to
the left. Edit-Copy. Edit-Paste as two new layers.
13 - SD NOSTALGIC TULIP. Image- Resize, 18% of the original. Image- Mirror. Image-Rotate: 90º to the left.
Edit-Copy. Edit-Paste as new layer.
14 - SD NOSTALGIC BUTTERFLY 1. Image- Resize, 30% of the original. Image-Rotate: 15º to the right. Edit-Copy.
Edit-Paste as new layer.
15 - SD NOSTALGIC BUTTERFLY 2. Image- Resize, 15% of the original. Edit-Copy. Edit-Paste as new layer.
16 - SD NOSTALGIC BUTTERFLY 3. Image- Resize, 12% of the original. Edit-Copy. Edit-Paste as new layer.
17 - SD NOSTYALGIC BUTTERFLY 4. Image- Resize, 15% of the original. Edit-Copy. Edit-Paste as new layer.
18 - With ARIZONIC font, size 72, color: # CF8156, write the title of the tutorial: *Regards* , stretch the letters
a little bit, see final image. Apply the plug-in Graphics Plus, effect: Shadow Cross twice.
19 - Effects-blur,blur. Do with those elements, that when we change the size, has blurred.
20 - Shade all elements of our tag using the plug-in Eye Candy 3.1, Effect: Drop Shadow. See capture. 
21 - Give credit to the artist and Scrap, put your name. I suggest that put the credits with the same font, Arial
Narrow, size: 8 color: # 404040.
22 - Remove the layer that we painted white. Merge all layers. Layers-Merge, merge visible.
23 - keep the tag as a PNG image. File-Export, optimized PNG file. Transparent checked. See capture. 
I hope you like it!
Ask me any questions.
Greetings. MilPinceladas.
Translated by Gely.
Suscribirse a:
Enviar comentarios (Atom)

Miembro de TWInc

About me
Categories
- Navidad (2)
- San Valentin (9)
- Tutoriales Alessa (8)
- Tutoriales Andy (1)
- Tutoriales Anna (96)
- Tutoriales Cariba (7)
- Tutoriales Español (169)
- Tutoriales Faria (12)
- Tutoriales Gely (10)
- Tutoriales Ibanaro (17)
- Tutoriales MilPinceladas (47)
- Tutoriales Natty (23)
- Tutorials English (52)
Amigos


0 comentarios:
Publicar un comentario